Nov 9, 2023
AWS Fargate CICD Pipeline with CDK
We’re going to build a CI/CD pipeline where our source code is stored on Github and server runs on AWS Fargate (ECS). Whenever there’s any new commit in the source code, our CICD pipeline is going to be triggered automatically and performs following steps
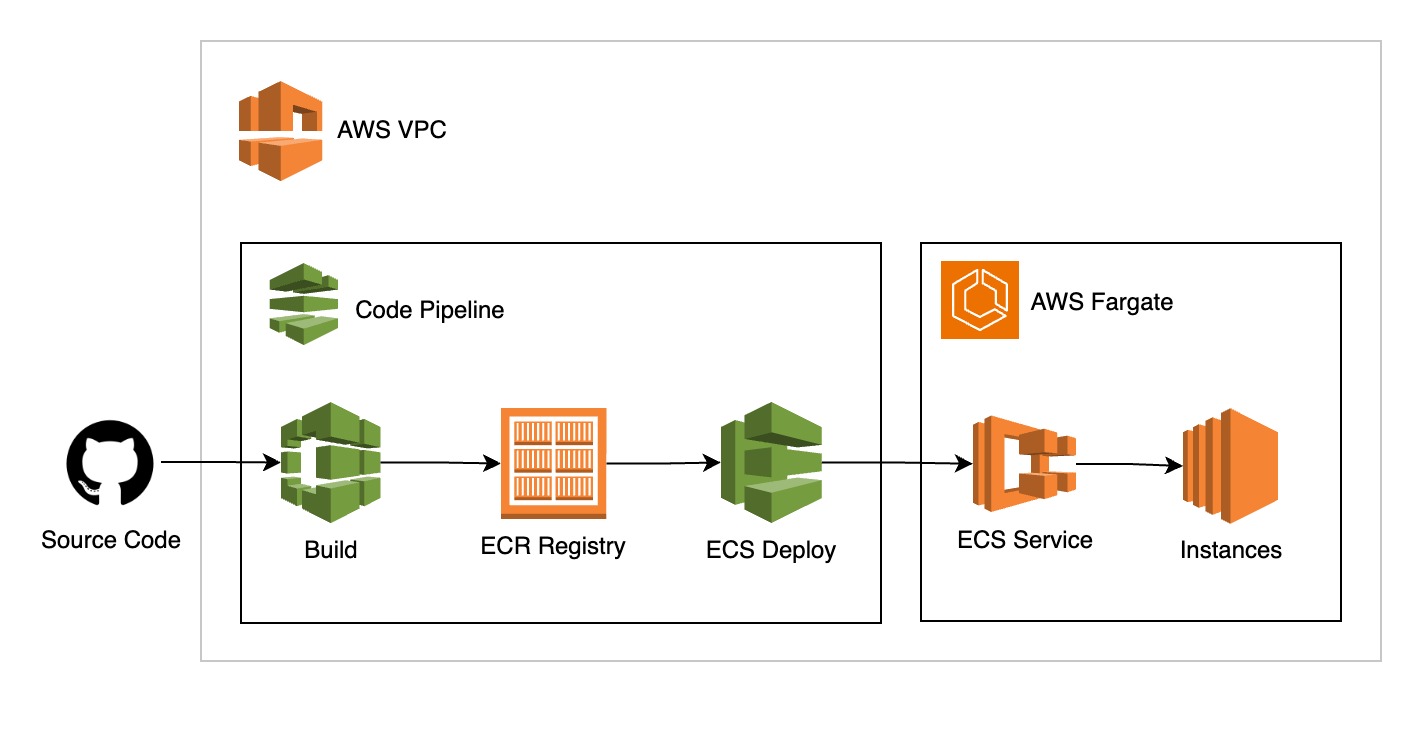
- Builds docker image of the source code
- Publishes the docker image to the ECR repository
- Create a new task definition for AWS Fargate service
- Update the Fargate service with new definition to load the new docker image
This article can be thought of as a reference to develop and deploy your own pipelines with AWS CDK. I assume you already have the basic knowledge of AWS CDK and AWS resources such as Load balancer, ECS and VPC.
I’m gonna use this barebones NestJs project as source code repository, you can also fork it or use your own server https://github.com/humayunj/docker-greeting.
The full source code of this cdk project is available at https://github.com/humayunj/cdk-ci-cd.
Let’s start by initiating a new CDK project
mkdir cdk-ci-cd && cd cdk-ci-cd
cdk init sample-app --language typescript
and create a new construct file lib/fargate-pipeline.ts for our pipeline resources.
// lib/fargate-pipeline.ts

import { Construct } from "constructs";

export class FargatePipeline extends Construct {
  constructor(scope: Construct, id: string) {
    super(scope, id);
  }
}
and import this to our stack.
// lib/cdk-ci-cd-stack.ts

import { Stack, StackProps } from "aws-cdk-lib";
import { Construct } from "constructs";
import { FargatePipeline } from "./fargate-pipeline";

export class CdkCiCdStack extends Stack {
  constructor(scope: Construct, id: string, props?: StackProps) {
    super(scope, id, props);

    new FargatePipeline(this, "dg-stack"); // <-- Add the construct
  }
}
Part 1: AWS Fargate Service
With basic structure in place, let’s create our resources in fargate-pipeline.ts. We’ll start with ECS Cluster along with VPC and security group.
// lib/fargate-pipeline.ts
// ...
export class FargatePipeline extends Construct {
  constructor(scope: Construct, id: string) {
    super(scope, id);

    const vpc = new ec2.Vpc(this, "fargate-docker-greeting", {
      maxAzs: 2,
    });

    const sg = new ec2.SecurityGroup(this, "dg-security-group", {
      vpc,
      allowAllOutbound: true,
    });

    sg.addIngressRule(ec2.Peer.anyIpv4(), ec2.Port.tcp(80));

    const cluster = new ecs.Cluster(this, "docker-greeting-cluster", {
      vpc,
    });
  }
}
With cluster in place, we need a task definition before we can start service in our cluster.
Task definition requires a role to be assigned with necessary policies to fetch the docker image from ECR.
// lib/fargate-pipeline.ts
// ...
const taskrole = new iam.Role(this, `ecs-taskrole`, {
  roleName: `ecs-taskrole`,
  assumedBy: new iam.ServicePrincipal("ecs-tasks.amazonaws.com"),
});

// TASK DEFINITION
const taskDef = new ecs.FargateTaskDefinition(this, "ecs-taskdef", {
  taskRole: taskrole,
});

const executionRolePolicy = new iam.PolicyStatement({
  effect: iam.Effect.ALLOW,
  resources: ["*"],
  actions: [
    "ecr:getauthorizationtoken",
    "ecr:batchchecklayeravailability",
    "ecr:getdownloadurlforlayer",
    "ecr:batchgetimage",
    "logs:createlogstream",
    "logs:putlogevents",
  ],
});

taskDef.addToExecutionRolePolicy(executionRolePolicy);

// ...
We need to provide docker image container reference in the task definition but we haven’t passed it so far, so let’s add a container to our task definition with required specs.
// lib/fargate-pipeline.ts
// ...
const container = taskDef.addContainer("docker-greeting-app", {
  image: ecs.ContainerImage.fromRegistry("amazon/amazon-ecs-sample"),
  memoryLimitMiB: 256,
  cpu: 256,
});

container.addPortMappings({
  containerPort: 80,
  protocol: ecs.Protocol.TCP,
});
// ...
WAIT! why did we pass amazon/amazon-ecs-sample image url instead of our own? That’s because we don’t have any docker image of our own source code yet so we pass a sample image from amazon to start our Fargate service. Once our pipeline is up and running, it’ll auto replace this image with our source code.
With task definition ready, let’s create our Fargate service with load balancer and CfnOutput for the load balancer dns name.
// lib/fargate-pipeline.ts
// ...
const service = new ecs_patterns.ApplicationLoadBalancedFargateService(
  this,
  "docker-greeting-service",
  {
    cluster,

    cpu: 512,
    desiredCount: 1, // try changing it to 2
    taskDefinition: taskDef,
    publicLoadBalancer: true,
  }
);

new CfnOutput(this, "LoadBalancerDns", {
  value: service.loadBalancer.loadBalancerDnsName,
});
// ...
We now have the CDK setup for our Fargate service, which runs a sample app from amazon. Let’s test it by deploying cdk project.
cdk deploy
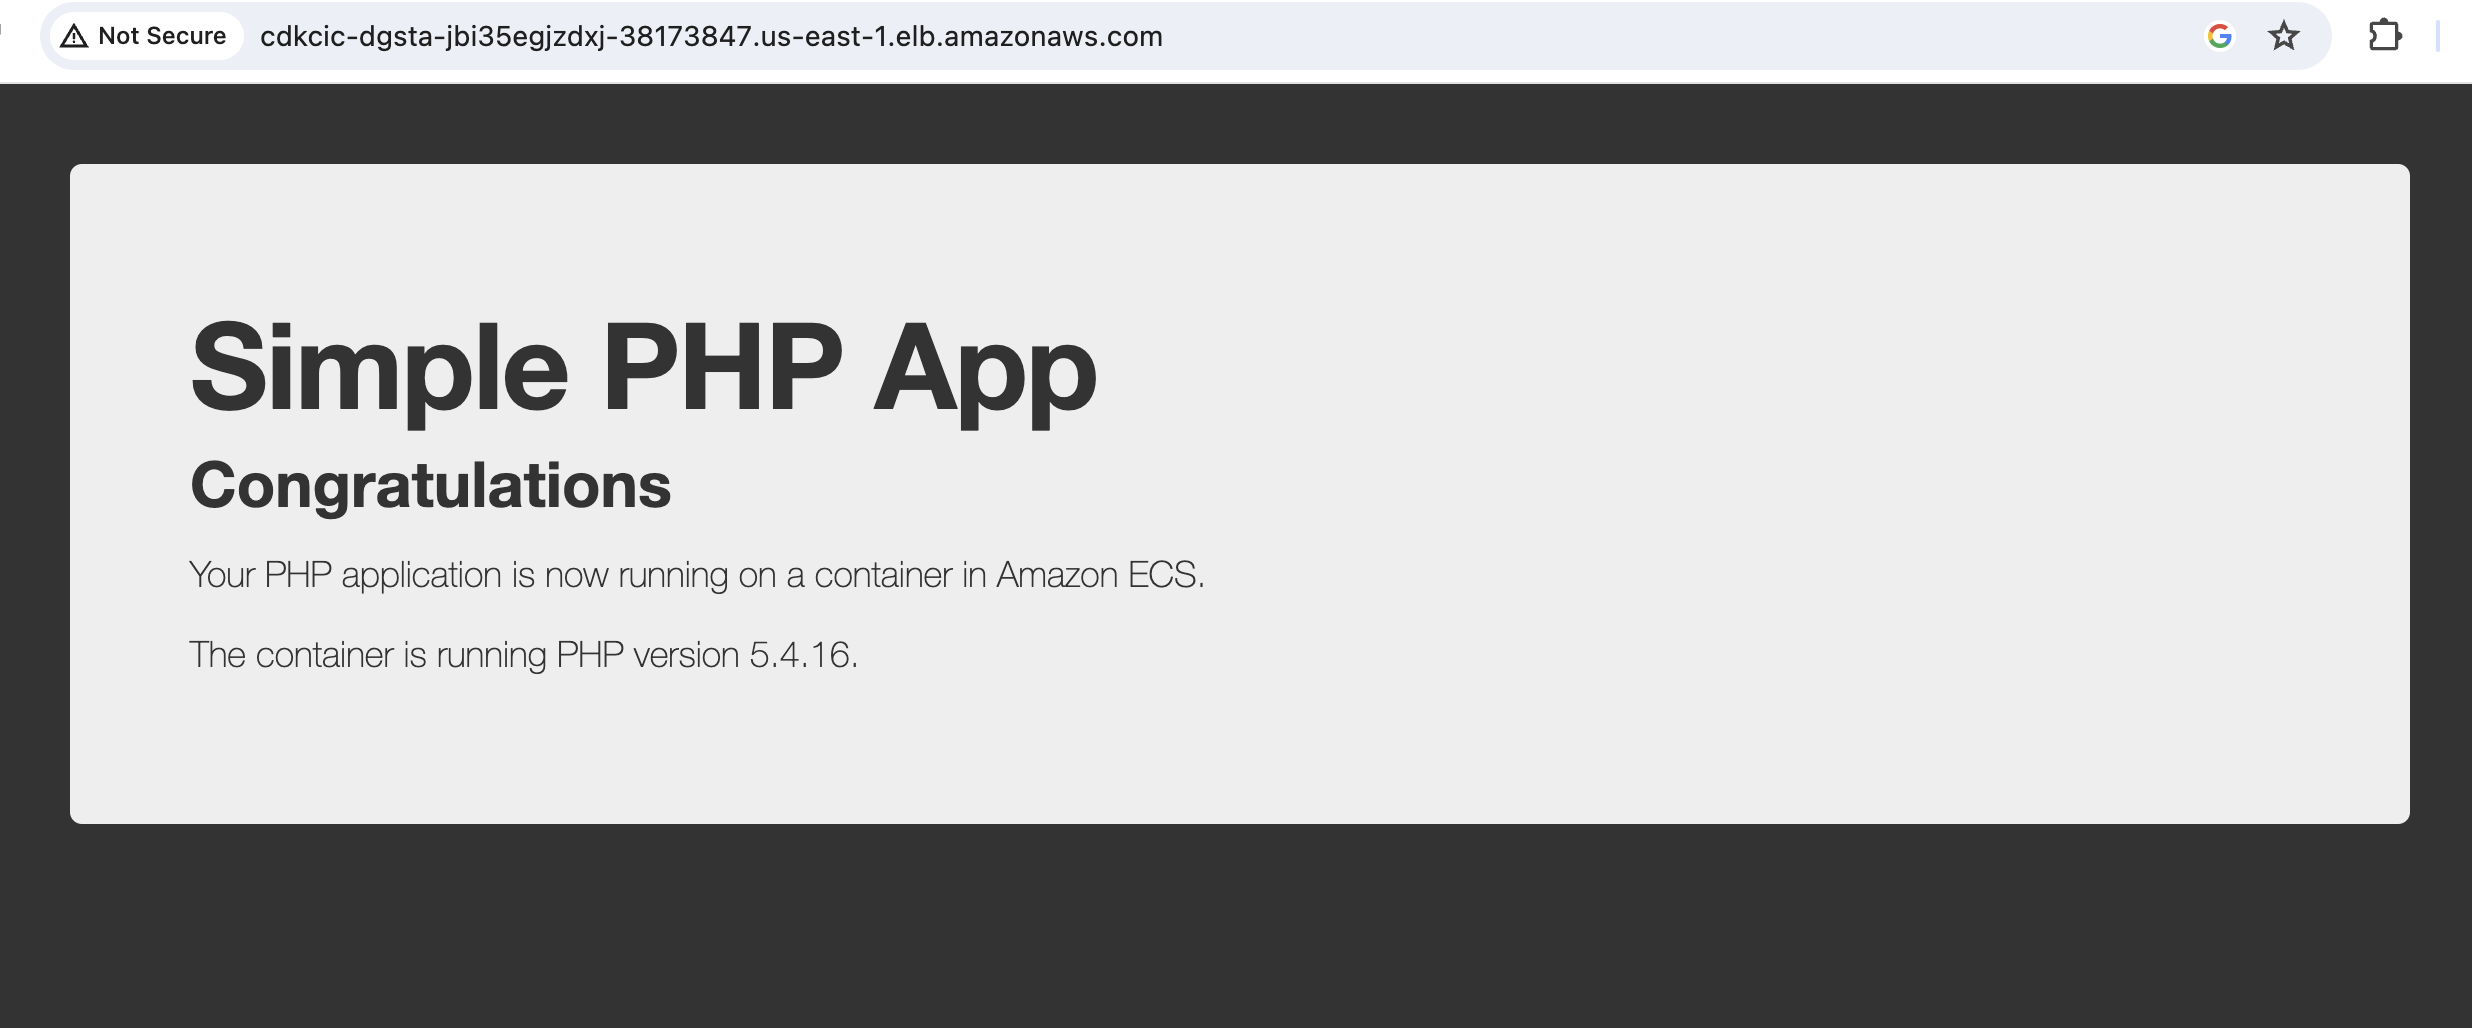
With deployment complete, you should see the following outputs. Copy the load balancer dns name url and open it in the browser.

An congratulations page from aws sample app should open.
Part 2: CI/CD Pipeline
We’re gonna build a pipeline in this part which will automatically update our Fargate service with new image whenever there’s a change in our github source code.
Before we start, you’ll need to create a personal access token in the github developer settings and allow access to the repository along Webhook, Content reading permissions. Copy the token in the .env file as we’ll need it soon.
Let’s start by creating Github source action, which’ll fetch the source code from github whenever’s commit on main branch.
// lib/fargate-pipeline.ts
// ...
const sourceOutput = new Artifact("SourceArtifact");
const oAuthSecret = SecretValue.unsafePlainText(
  // Use SecretManager in prod
  process.env["GITHUB_TOKEN"]!
);
const sourceAction = new GitHubSourceAction({
  actionName: "source",
  repo: process.env["GITHUB_REPO"]!, // repo name only not url
  oauthToken: oAuthSecret,
  output: sourceOutput,
  branch: "main",
  owner: process.env["GITHUB_USERNAME"]!,
});
This source action will fetch the source code from our github repo, and outputs it to sourceOutput artifact.
Now we have the source, let’s build the docker image and publish it to ECR. But before this we need an ECR repository where we’ll store images and role with permission to ECR access.
// lib/fargate-pipeline.ts
// ...
const repo = new ecr.Repository(this, "docker-greeting-repo");

const buildRole = new iam.Role(this, "buildRole", {
  assumedBy: new iam.ServicePrincipal("codebuild.amazonaws.com"),
  managedPolicies: [
    iam.ManagedPolicy.fromManagedPolicyArn(
      this,
      "ECRAccess",
      "arn:aws:iam::aws:policy/AmazonEC2ContainerRegistryFullAccess"
    ),
  ],
});
// ...
We’re going to use CodeBuild to build our docker image. We need to specify the build steps in order to build the image and this is usually done in buildspecs. We could include buildspecs in our source code repo but to simplify things we’ve included it in our CDK project.
We also need to output imagedefinitions.json as artifact at the end of the build for our deploy action so it can update our Fargate service with new docker image.
// lib/fargate-pipeline.ts
// ...
const buildOutput = new Artifact("DockerBuildArtifact");

const buildSpecs = BuildSpec.fromObject({
  version: "0.2",
  phases: {
    pre_build: {
      commands: ["env", "export tag=latest"],
    },
    build: {
      commands: [
        `docker build -t $ecr_repo_uri:$tag .`, // build image
        "$(aws ecr get-login --no-include-email)", // config ecr credentials
        "docker push $ecr_repo_uri:$tag", // publish image to ECR
      ],
    },
    post_build: {
      // create imagedefinitions.json
      commands: [
        'echo "in post-build stage"',
        `printf \'[{"name":"${container.containerName}","imageUri":"%s"}]\' $ecr_repo_uri:$tag > imagedefinitions.json`,
        "pwd; ls -al; cat imagedefinitions.json",
      ],
    },
  },
  artifacts: {
    files: ["imagedefinitions.json"],
  },
});
// ...
We can now create CodeBuild PipelineProject and build action along with necessary permissions.
// lib/fargate-pipeline.ts
// ...
const buildProject = new PipelineProject(this, "CodeBuildProject", {
  projectName: "app-build",
  vpc,

  environment: {
    buildImage: LinuxBuildImage.AMAZON_LINUX_2_3,
    computeType: ComputeType.SMALL,
    privileged: true,
  },
  environmentVariables: {
    cluster_name: {
      value: `${cluster.clusterName}`,
    },
    ecr_repo_uri: {
      value: `${repo.repositoryUri}`,
    },
  },
  role: buildRole,

  buildSpec: buildSpecs,
});

const buildAction = new CodeBuildAction({
  actionName: "codeBuildAction",
  project: buildProject,
  input: sourceOutput,
  runOrder: 1,
  outputs: [buildOutput],
});

repo.grantPullPush(buildProject);

buildProject.addToRolePolicy(
  new iam.PolicyStatement({
    actions: [
      "ecs:describecluster",
      "ecr:getauthorizationtoken",
      "ecr:batchchecklayeravailability",
      "ecr:batchgetimage",
      "ecr:getdownloadurlforlayer",
    ],
    resources: [`${cluster.clusterArn}`],
  })
);
// ...
We can now have the docker image in ECR with this action. To deploy this image with new definitions we’ll use EcsDeployAction.
// lib/fargate-pipeline.ts
// ...
const deployAction = new EcsDeployAction({
  actionName: "deployToECSAction",
  service: service.service, // Our Fargate service
  input: buildOutput, // output with imagedefinitions.json
});
// ...
Let’s glue these actions together with CodePipeline.
// lib/fargate-pipeline.ts
// ...
const pipeline = new Pipeline(this, "docker-greeting-pipeline", {
  pipelineName: "docker-greeting-pipeline",
  crossAccountKeys: false,
  stages: [
    {
      stageName: "source",
      actions: [sourceAction],
    },
    {
      stageName: "build",
      actions: [buildAction],
    },
    {
      stageName: "deploy",
      actions: [deployAction],
    },
  ],
});
// ...
and that’s all! We now have the CICD pipeline, let’s deploy our cdk project.
cdk deploy
Once deployment complete, open your pipeline in AWS console. You should see the steps in progress.
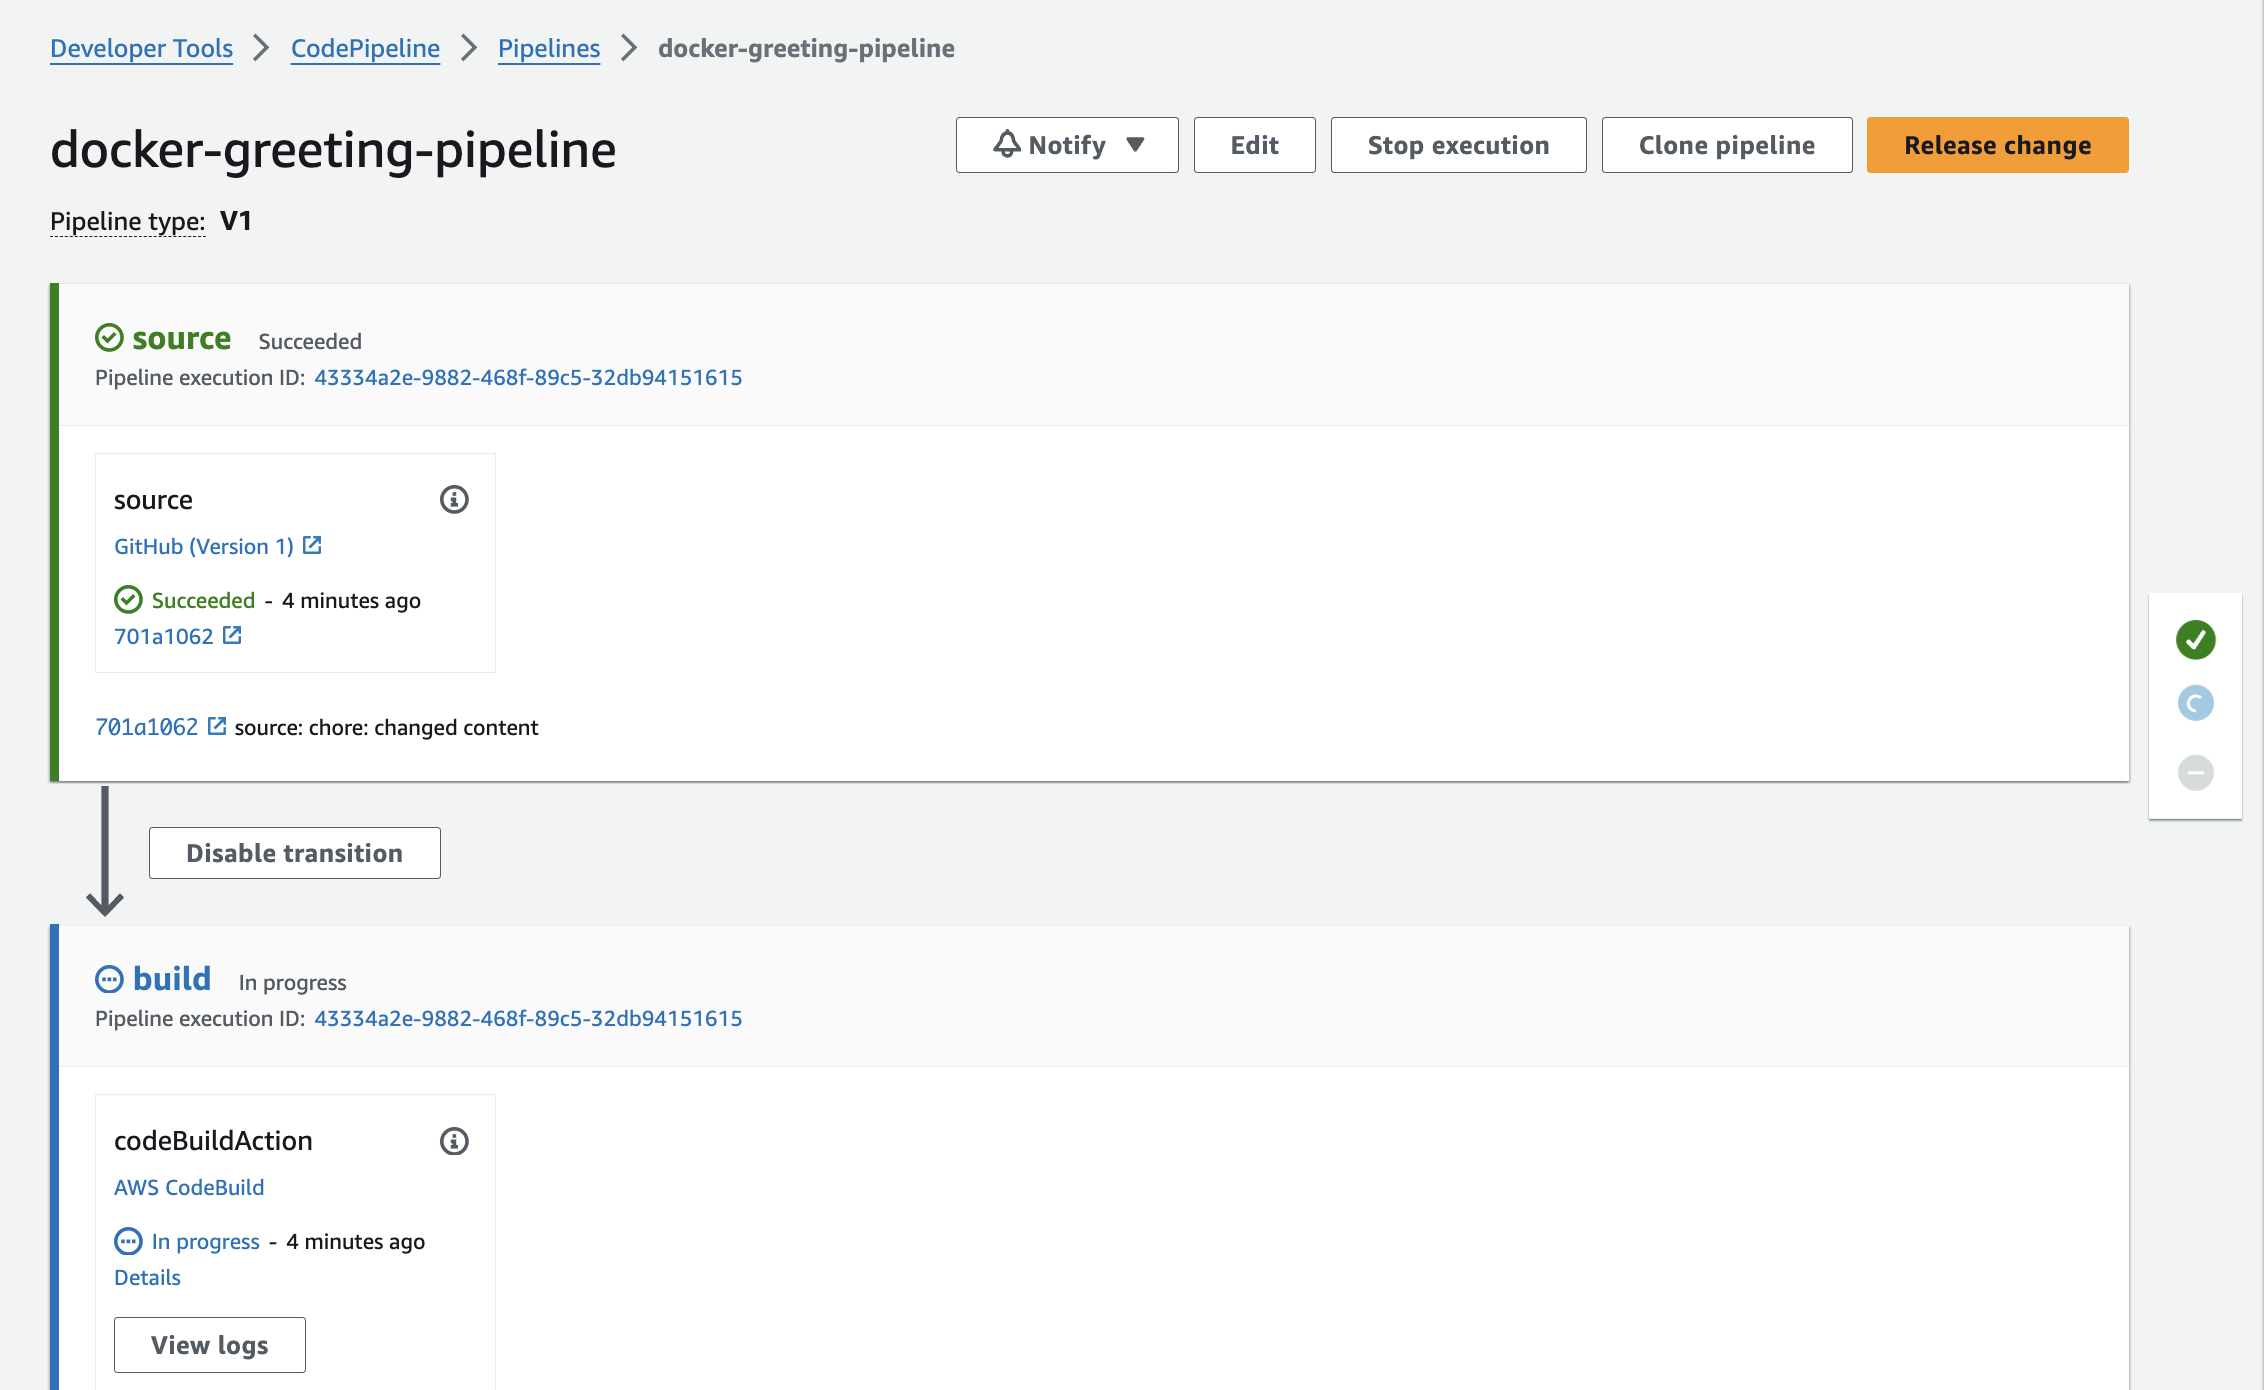
Once the build step is complete, the deploy step is gonna take some time as the existing ECS instances have to be drained and new instances launch with new docker image.
Once the deployment completes, open your load balancer dns name url again and you should see this greeting.
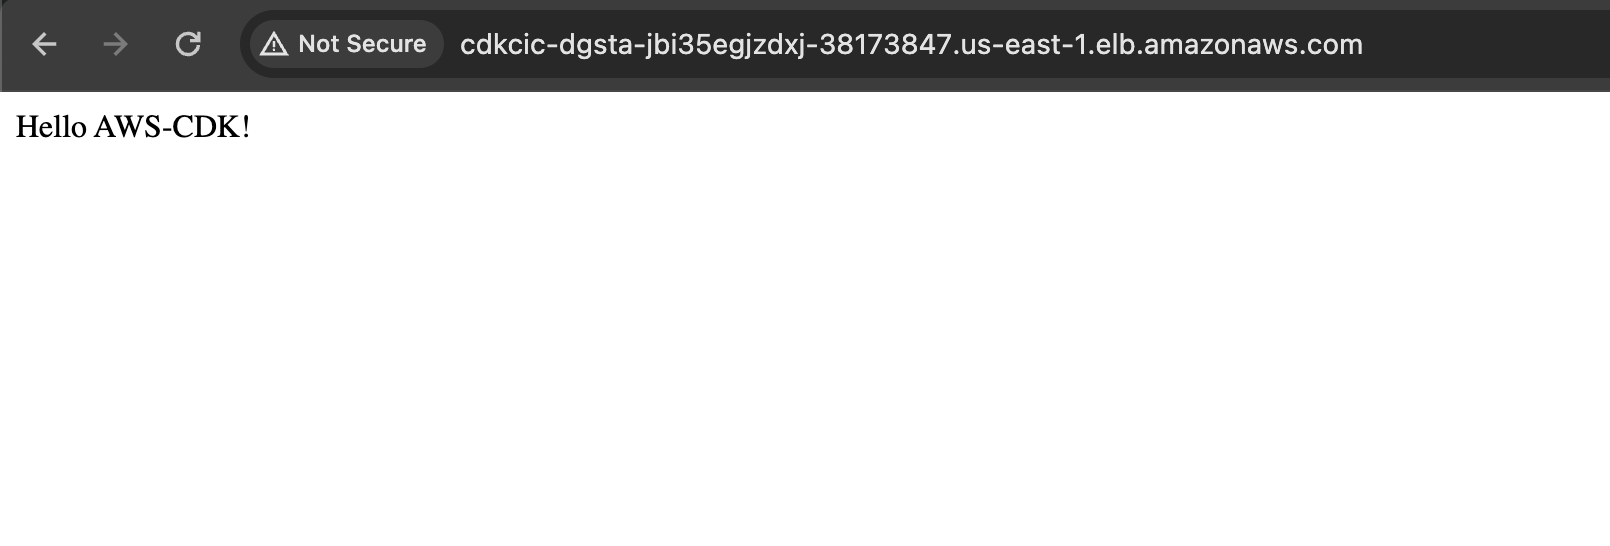
Go ahead and modify this text in the source code repository, commit and push the change to github. You should see a new build is triggered in our pipeline.
FAQs
Unit Testing
For unit testing, add a new build action and project with commands to run unit tests.
Executing Shell Commands
Use CodeBuildAction to arbitrary execute shell commands e.g use curl to invoke slack api.
Notifications
You can post notifications with curl but AWS provides SNS events with pipeline as sources. Take a look at this article https://aws.amazon.com/blogs/devops/how-to-add-notifications-and-manual-approval-to-an-aws-cdk-pipeline/
Difference Environments
Scope your CDK stack resource ids with an environment value e.g “dev” or “qa” and change the GithubSourceAction branch accordingly. Deploy the stacks multiple times with different environment value.
Promoting to Prod
You can use prod env to deploy to prod. But AWS provides Manual Approval action ManualApprovalAction, you can create the following flow with it:
- Deploy to test
- Ask for approval
- Deploy to prod (if approved)